Your child might find comfort in sensory bottles. They are excellent for young children, toddlers, preschoolers, or any child who enjoys engaging in visual stimuli. How to make sensory bottles?
What you want is a flawless sensory bottle, but getting there sometimes requires a lot of trial and error. We’ve experienced a variety of unexpected outcomes, including lids breaking, mold growing, magnets rusting, complete failures, and many others. However, they have always been an adventure, and over time, my strategy has evolved to be much more scientific. Keep reading!
Table of Contents
What Are Sensory Bottles?
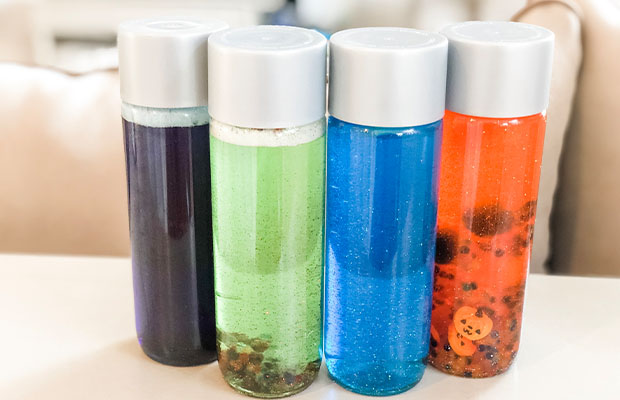
To give a child non-messy, sensory play, and stimulation, sensory bottles are containers that typically include water, clear glue, and any fun materials you’d like. Babies and young children enjoy shaking them up and watching the glitter and objects float around before they settle to the bottom.
Benefits Of Sensory Bottles
Children, and even adults of any age, can benefit greatly from sensory bottles. For anyone who is overstimulated, they can have a calming effect. For a child who is understimulated, they can even arouse them.
Children who struggle to control their emotions due to any stressor benefit from sensory bottles.
Your child will become fascinated by watching the slow descent and movement of the objects as the sensory bottle is shaken and the contents move around the container. You’ll observe that doing so makes them feel calmer, helps them control their emotions and actions, and relaxes them.
You’ll really see the advantages if you teach your kid how to use the sensory bottle before they get overly anxious or stimulated. They will discover that they can use the sensory bottle to calm themselves down once they start to feel upset.
How To Make Sensory Bottles?
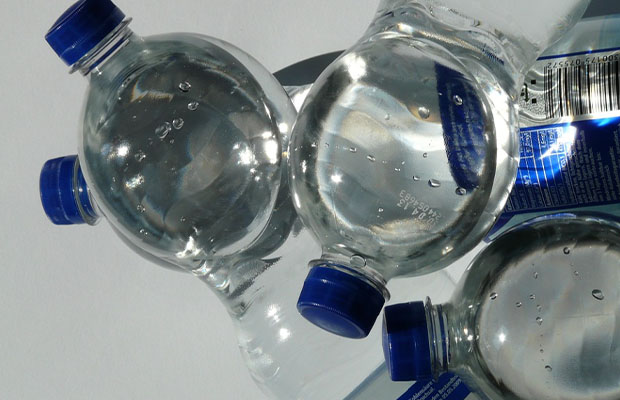
Step 1: Fill the empty water bottle halfway with warm water. If you intend to use these bottles for an extended period of time, use Voss bottles or these hard plastic bottles. They are the most resilient and can be supported from either the bottom or the top.
Step 2: With clear glue, fill the remaining space. Don’t use white glue for sensory bottles because you want to be able to see through them. To avoid overflowing, leave a small space at the top to add the trinkets.
Step 3: To change the bottle’s color, squeeze in a drop of food coloring. USE VERY LITTLE food coloring! You can always increase something, but you can’t decrease it. The water should still be clear enough for you to see everything that is afloat.
Step 4: Include glitter and all the playful extras. To ensure that they float effectively, make sure that any items you use are lightweight.
Step 5: Watch as you combine everything!
Step 6: Glue the lid shut.
How To Pick Up The Right Sensory Bottle?
The bottle is comparable to your lens. Along with size and sturdiness, shape and clarity are crucial.
Over time, I’ve discovered that lighter bottles are best for heavy sensory bottles and that a bottle that is suitable for older children may not always be suitable for infants and toddlers.
Here are some of my favorites (although there are undoubtedly others):
Voss Water Bottle For A Sensory Bottle
Beautiful and modern VOSS water bottles are available! It just looks absolutely stunning with the silver lid. A VOSS water bottle served as the material for my rainbow discovery bottle. Oh, and the water is also very tasty.
Pros:
- Nice smooth edge
- Flat bottom
- Big opening for objects
- 3 sizes to choose from
Cons:
- Lids can break when dropped
- Not widely available
- Not as sturdy as other bottles
VOSS bottles have been located in the following places: Kroger or King Soopers, Wal-Mart (online and in-store), Whole Foods, TJ Maxx, a few convenience stores, boxed.com, Target, and of course online at Amazon.
They can be found in glass or plastic. Since a bottle begins to weigh more when a liquid ingredient is added, I’ve always purchased plastic containers. The plastic bottles will be easier for kids to pick up. However, for some people, glass works well.
This Voss Water, 11.2 oz. is the smallest size and perfect for all ages. For any sensory bottles that use liquid, I wholeheartedly advise it.
Sparkling Ice Bottle
Smooth and pleasant, sparkling ICE bottles make an excellent choice for a sensory bottle. I have one in my alphabet discovery bottle.
Pros:
- Can be found at many grocery stores
- Sleek edges
- Sturdy
Cons:
- Narrow Opening
- The bottom is not flat
- Only one size
Craft Bottles As A Sensory Bottle
Craft bottles are a creative alternative to sensory bottles. They are available in a variety of sizes and shapes.
Pros:
- Perfect for young children
- Easy to hold shape
- Flat base
- Several Shapes
- Different sizes
Cons:
- Narrow opening
- Tricky to find
Craft supply shops carry bottles for crafts. They cost about $1 per bottle, and I’ve seen them close to the colored sand. Look for sand art bottles if you’re looking for them online.
Aquaball Bottles For Sensory Bottles
In the event that you are unable to locate a craft bottle, an Aquaball water bottle is a great substitute. The blue lid and ball-shaped container make it simple to identify.
Pros:
- Perfect for young children
- Easy to hold shape
- Flat base
- Available in many grocery stores
Cons:
- Narrow opening
- One size
At the neighborhood supermarket, I discovered my Aquaball.
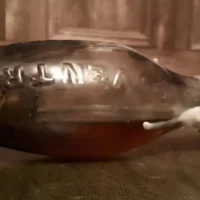
Recycled Containers As A Sensory Bottle
Wonderful sensory bottles can also be made from recycled containers. There are many wonderful recycled sensory bottles at Sugar Aunts. Here is the first of her math dominoes.
My friend Cathy created these sensory bottles using plastic spice containers that we discovered at a secondhand shop.
Pros:
- Recycled containers are very affordable, if not free
- The majority of recycled containers have a sizable opening through which objects can pass.
- You’re giving something old new life.
Cons:
- Since every container is unique, it is difficult to say.
Alternatively, old food-related containers are excellent for this. Jars for peanut butter or containers similar to these work great.
Tips For Making Sensory Bottles
- There is a lot of food coloring in a little bit! At first, only add a single tiny drop. More can always be included. You shouldn’t use too much food coloring, especially the gel variety. The glitter bottle is useless if it gets too dark because you can’t see the glitter or the items inside.
- Make sure the items you use are not too heavy or they will simply fall to the bottom. Keep it to glitter only if you don’t have any lightweight items.
- The pieces will probably initially stick together. The bottles will further separate after they settle (in a few days).
- Superglue the lid shut, especially if you have young children who are naturally curious. The last thing you want is for your child to open the container and let the contents spill out all over.
Liquid Ingredients For Sensory Bottles
Each one’s liquid components, which vary in composition, are what cause the objects or glitter inside to move. Therefore, be sure to take into account how you want the bottle to flow.
Additionally, bear in mind that if you use the incorrect liquid ingredients, anything metallic or magnetic will rust.
- Water: Magnets and metal objects can’t be added because they rust over time, but you can add almost anything else.
- Colored Water: Simply color some water with liquid watercolor or food coloring. Easy peasy!
- Mineral or Baby Oil: Mineral oil will cause the contents of the bottle, like glitter, to move a little more slowly after being added. For magnets and other metallic objects, it’s a fantastic solution. Using the appropriate food dyes is necessary if you want to color the oil.
- Cooking Oil: With colored water, this is a great, inexpensive option. You can use it to demonstrate scientifically how water and oil separate as opposed to mixing.
- Liquid Soap: I’ll give you another liquid ingredient with a slowing effect. Dish soap, hand soap, and shampoo are all excellent options.
- Glycerine: Additionally, it will slightly slow down items like glitter.
- Corn Syrup: Your sensory bottles will significantly slow down objects if you add corn syrup to them, but the items must be clean or mold could grow on them. Corn syrup is actually sugar!
- Glue: I frequently use glue in my sensory bottles; the slow-falling effect it produces makes them ideal for calm-down bottles. Be a little more cautious when using glitter glue, though, as it appears to function differently than regular clear glue.
- Hair Gel: For their bottles, this creates the appearance of a slow fall or suspension. It will assist in making dry ingredients “stay put.”
- Tonic Water: Tonic water can make you a sensory bottle that glows in the dark!
The Bottom Line
This should help you decide on the ideal supplies and components to create the sensory bottle you really want. If you have other questions, please leave your comment below.
Read More: How To Draw A Water Bottle?